Monday, December 17, 2012

C.Blau for the Holidays

As this Holiday shopping season is coming to a close, I'm happy to report that the 1st collection of C.Blau handbags is almost entirely sold out!  I have a few left if you would still like to get one in time for the holidays.  I can have it wrapped in burlap and ribbon and sent out wherever you would like.


I've received some great feedback about the bags, and was recently blogged about on Radar To The Scene  She reviews all things fantastic and has a lot to say about beauty products, fashion, food and music.

Also, my good friend Lindsey who moved home to Omaha, Nebraska and opened up her dream store Piper, is selling C.Blau handbags.  If you're ever in the Omaha area, be sure to stop in and check it out.  She recently starting selling online, so if you don't happen to be local you can still buy! She has a great eye for the unique and special and gets a lot of emerging designers in her store.  Check out what she had to say about C.Blau in a recent blog post

I will have the Spring 2013 collection of C.Blau handbags ready by late January.  Keep posted for potential online shopping available in February!  I'll give you a sneak peak at the design process/colors in future posts.  Stay tuned!


Tuesday, October 30, 2012

C.Blau handbags

This has been a long time in the making.   I've gathered my experiences and honed the skills I've learned from previous jobs.  I've taken a bite out of life and gone for a passion of mine.  I've created and designed a line of leather handbags.  The bags are manufactured in the U.S.A. and stamped for approval by yours truly.  No seriously, I've hand stamped each bag with it's own number, so your number will only be your number.  As you know by now, I'm infatuated with color.  The leather colors for this first collection are beautiful and vibrant! These clutch handbags are available in solid colors and two-toned.

You can view the C.Blau website here.  For now, I don't have a online store through the website, but email me at christina@cblau.com and I would be happy to make payment arrangements and send you a clutch!

These bags are made in limited quantities and the colorways will be constantly evolving.

Enjoy!


Wednesday, September 12, 2012

Butterfly garden

I'm always expanding and trying out new things in the garden.  My latest kick has been trying out a butterfly garden.  It's very simple in fact, the butterflies do all the hard work.....all you have to do is provide the right plants.  Butterflies need two kinds of plants in order to reproduce and inhabit your garden.  The first is nectar plants that will provide a food source for the butterfly.  The second is a host plant in which the female butterflies will lay her eggs and caterpillars will hatch.  The caterpillars are hungry buggers and will devour an entire plant stalk in one day.  I learned the hard way and planted my milkweed (host plant for a Monarch butterfly) front and center in the garden.  I wanted to be able to watch them from the living room window.  Well, I watched them all right.........I had ugly sticks to look at within a few days.  I replanted them at the side of the house where they are semi out of sight.    

The image to the right is a swallowtail butterfly just hatching from it's chrysalis.  The caterpillar feeds on the Passion vine.


Below are some pictures of the Monarch caterpillar eating it's way through the Milkweed plant.  As I said, not exactly pretty.


After about 10 days, the caterpillar wanders off (sometimes 20-30 feet!) and finds a safe place to form a Chrysalis.  It is sometimes difficult to find them. This is where it will hang for about 5 days.  The Monarch chrysalis changes colors over those 5 days.  It starts out a bright jade color with gold metallic flecks.  Everyday it darkens more and more until it looks almost black.

Every butterfly species has a different looking chrysalis.  The Swallowtail's looks like a crispy stick.  I think the Monarch's is by far the prettiest.  


Once it hatches, it will look for nectar plants to feed on.  Then the process starts all over again and the female will lay her eggs on the milkweed.  


During the months of July and August there would be at least 3 different butterfly varieties constantly fluttering around the garden.  It was really cool to witness and I was constantly yelling for Tony to come out and look at all our butterflies......yes, I did call them "our" butterflies.  I guess I got attached.   This would be a great project to try with your children.......or for yourself if you're a child at heart like me.


Friday, August 24, 2012

Something's brewing!


I just wanted to send out a sneak peak of something that I've been working on.  I'll give you a hint....it involves leather and zippers.  If you can read tiny print, the text at the bottom of the tag will give it away.  More to come later next month!

Sunday, July 22, 2012

mangoes taste like candy

Alright, I know I said before that figs are my favorite fruit.  Well, I take that back.....since moving to Florida mangoes have moved up the rank to No.1.  I know what most of you are probably saying, "I don't know if I really like mangoes" or "I would never think to buy a mango".  Well, you are probably saying this because you haven't ever had a FRESH mango.  Like just ripened and hot from the sun.  From your backyard.  As far as I'm concerned, if you live in Florida and don't have a mango tree growing in your yard, you are doing yourself a disservice.  When you buy a mango from the grocery store, I don't think you get a choice of what variety you're getting.  You're just getting a mango that has been shipped in on a food truck.  In Florida, when buying a mango tree there are many varieties to choose from, depending on the size yard you have, to the flavor and how early they ripen.  Check out this helpful link to view the mango varieties.  I bought a Glenn Mango, mostly because it is fiberless (you don't want a stringy mango), and because it is a smaller tree.  Glenn mangoes have a very sweet, almost "peachy" flavor.  I got the tree a couple of years ago, so this was our second crop (if you could call it that).  We had 7 mangos........count it 7.  Tony and I knew it was 7 because once they started growing we checked on them everyday.  Last year we lost a couple to some opossums.  When you only have 7 mangoes a year, you are very selective on who you share them with.  Hopefully in the next few years we'll have an abundance and be able to share them with our neighbors. 


So, what do you do with a mango?  If you are like me, you stand over the sink and eat it like a barbarian....juice running down your chin with a happy grin on your face.  It is just that good.  Mangoes make a great salsa over fish.  Just chop it up with some jalapeno, red onion, cilantro and lime juice.  Since I only had one mango left, I decided to use it in a salad.  I think this simple salad was one of the best I ever made.


Baby Arugula and Mango Salad
large handful of baby arugula
1 mango, peeled and chopped
olive oil
rice vinegar
pinch of red pepper flakes
pinch of sugar
squirt of mustard
salt and pepper
fresh grated parmesan


In order to get to the edible flesh of the mango, you need to peel back the outer layer.  I find this is easy to do with a sharp knife.  The mango has a hard seed in the center.  I find it easiest to just start shaving off chunks around the seed.  Then chop the chunks into your desirable size.  I like a big bite, so mine stay large. 


Make the dressing directly in your salad bowl.  Add the olive oil, vinegar, red pepper flakes, sugar and salt and pepper.  Whisk this together pretty well and adjust to your own preference.


 I love the bitter taste of baby arugula.  I think it balances out the sweetness of the mango.  The red pepper flakes add just enough heat.  Add fresh grated parmesan cheese, and that's it.  You're done.  You won't believe how much flavor comes out of that simple salad.


So hopefully at this point I've perked your interest to go out and try a mango.  Unfortunately, if you live up north, don't make your mind up completely until you've tried one straight off the tree. I promise you won't be disappointed.
 

Thursday, June 21, 2012

lazy days and figs

Most of Fiona's movement during the day is following the patch of sun through the dining room windows. By the time we get home from work, the fur on her belly is hot and she is purring and stretching in contentment.  If you ever need a lesson in relaxation, adopt a cat.  They seem to understand the epitome of letting everything go and just be content to lay in the sun.  After all, isn't this what summer is all about?


Yes, I like strawberries, and raspberries.  Oh, and blueberries and blackberries are delicious as well.  But I LOVE figs.  These late summer fruits are abundant up north in Southern MD.  In fact, I have a great friend in NY who's family hosts an fig-inspired meal every summer.  Fig Fest has become a popular event and grown in size since it's inception 4 years ago.  The family has a very large fig tree on the side of the house that has inspired and produced the fruits for the day.  The beauty of the fig in my opinion is it's diversity in complimenting many flavors.  It's great with meat, on salads, or canned as a preserve.


The picture to the left is my Brown Turkey fig tree.  It's not ripe yet, but when it does ripen, the color will be a brown, purplish color.  The hard part is keeping the birds, opossums and other animals from eating them before I can.


This recipe is very easy and delicious.  It has bacon and figs.  What more could you ask for?  Oh, and fresh herbs from your garden.  I found ripe Black Mission figs in our local Publix.  You could save this recipe for later in the summer and use your own!  This is an appetizer I discovered a while ago out of the book The Herbal Kitchen    


Warm Figs filled with Goat Cheese and Bacon
1 tsp olive oil
4 oz bacon
1/4 cup finely chopped onion
1 TBSP chopped rosemary
1 TBSP chopped thyme
1/2 tsp salt
6 large ripe figs, at room temp
1/4 cup soft goat cheese

preheat oven to 350 degrees


Chop your bacon into small pieces.  Add the olive oil in a small skillet over medium heat and render the bacon until it is nearly crisp.  Pour off half the fat, and add the onion, rosemary, thyme and salt.  Cook, stirring often, until the onion is soft.  About 3 minutes.


Cut the figs in half and press your thumb into the center of each half to make a small depression.  Arrange them face up in a shallow glass baking dish.


Add a spoonful of filling to each fig, making sure to cover the top.  Crumble the goat cheese and place roughly a tsp on each fig.  When ready to serve, bake the figs until just warmed through, about 5 min.


Serve warm and ENJOY!


Tuesday, May 29, 2012

from garden to table


There is something very satisfying in growing your own food.  For one thing, you really can't get anything more fresh, but even beyond that, it's the fulfillment of knowing that you tended to it and grew it on your own.  One of the easiest ways to get started is planting herbs.  You can plant your herb garden in a raised bed like mine, or if you're low on space, simply plant your herbs in small pots where you have room outside.


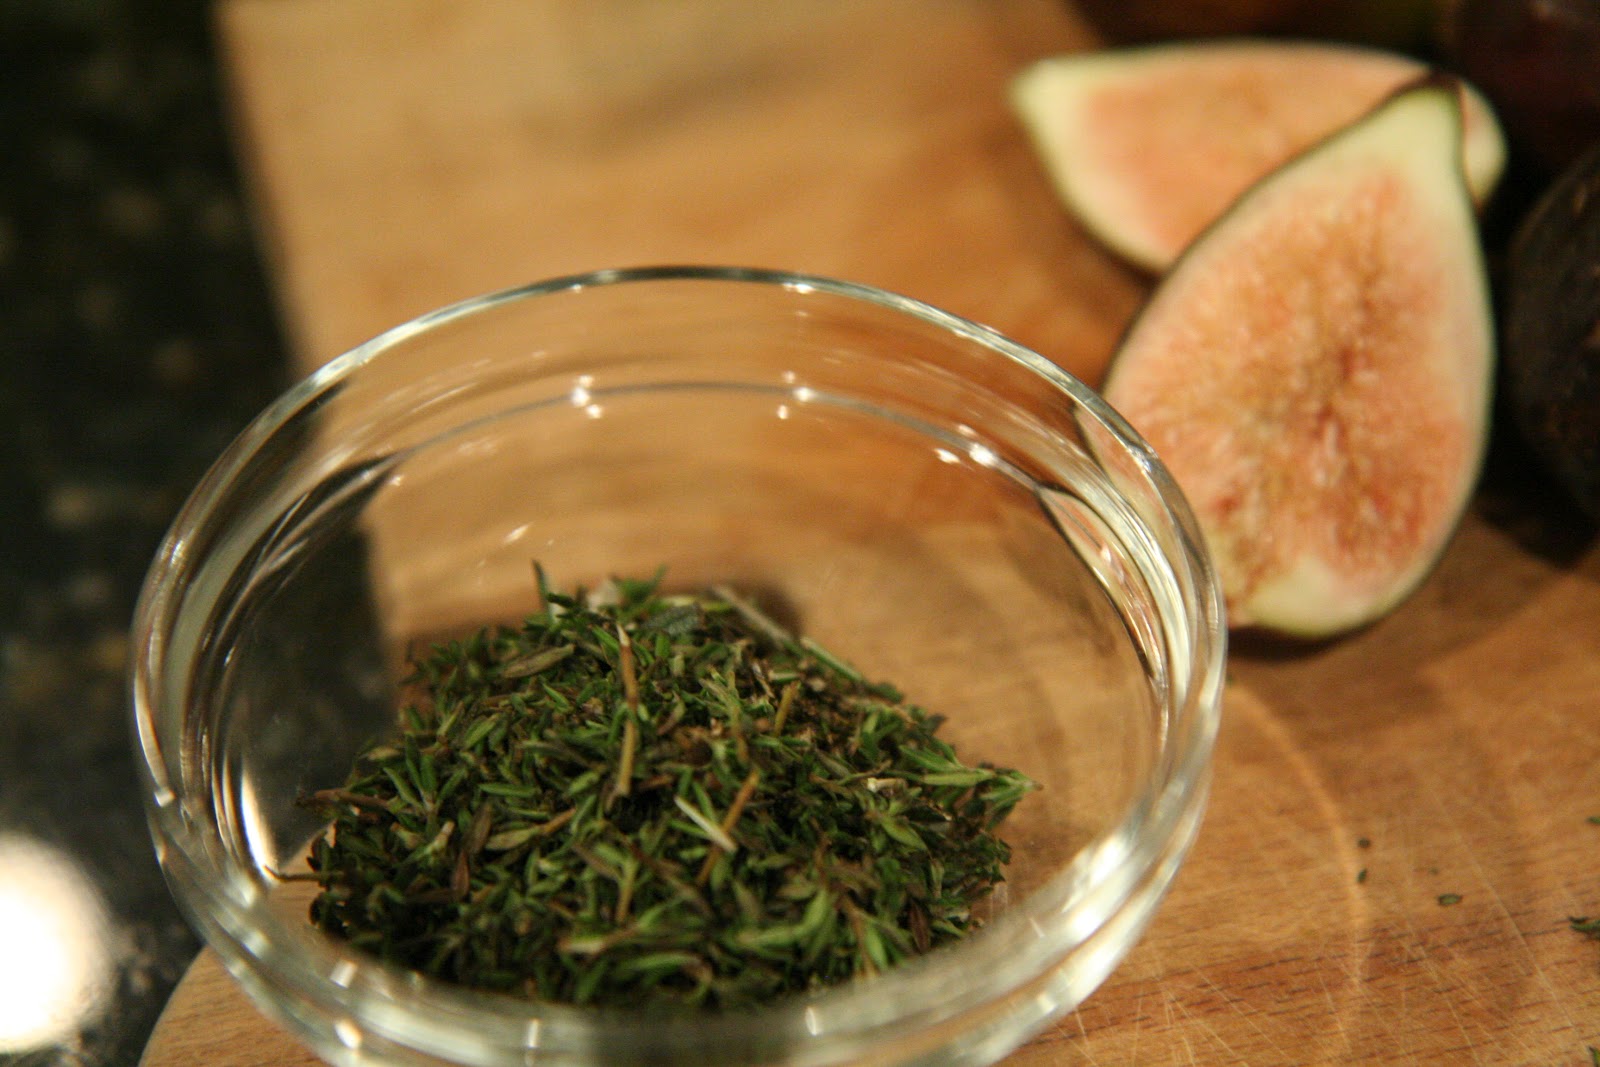
For today, I decided to focus on Oregano.  As you can see from the picture to the right, it's pretty just to look at without tasting!  I have found that it is very easy to grow and you can add it to many dishes.  I think it has a woody, earthy flavor that goes great with tomatoes.

If you're like me, you can eat tomatoes anytime......marinated in a vinaigrette, stewed in a marinara sauce, or just eaten like an apple with a pinch of salt!  One of my all-time favorite ways to eat tomatoes is when they're roasted.  I have adapted this recipe from my mom.  It's easy, delicious, and uses a lot of oregano.   It's perfect as an appetizer, but my husband and I end up eating it for dinner or even breakfast.

Roasted Tomatoes
4 tomatoes
1/4 cup extra virgin olive oil
1/2 tsp salt
1/8 tsp sugar
2 Tbsp fresh chopped oregano
lots of fresh cracked pepper
loaf of fresh bread


Preheat your oven to 350.  Remove the stem and cut your tomatoes horizontal into 3 slices for each tomato.  Lay them into a glass baking dish and pour your olive oil evenly on top.  


Sprinkle salt, sugar, fresh pepper and oregano evenly over the tomatoes.


Roast for about 45 minutes or until tomato softens


Slice your loaf of bread and put on as many tomatoes that you can fit!


I put a little shredded Manchego on top for kicks.  Pair this with some wine and you've got yourself a treat!


Another way to use oregano is in dressings.  I don't think I've bought salad dressing in 3 years.  It's so simple and much cheaper to make your own.  Here are two dressings that you could try!

Garlic-Oregano dressing
1/4 cup extra virgin olive oil
1 large garlic clove
2 Tbsp rice vinegar
2 Tbsp fresh oregano
1/2 Tbsp honey
1/8 tsp salt
small pinch of red pepper flakes


Put all ingredients in a food processor.  This is great on salads, but would also be delicious over chicken.


Everyday Salad dressing  (this is one of my standards)
1/4 cup extra virgin olive oil
2 Tbsp rice vinegar
1/2 Tbsp jam (I happened to have black raspberry jam in the fridge)
1/2 tsp dijon mustard
1/2 tsp chopped fresh oregano
1/8 tsp salt

Whisk everything up together, and you're done!


I hope everyone is inspired to go out a plant some herbs.  Start small and try out some recipes, or just make some up of your own!  I promise that is won't just taste good, but it will feel like you've accomplished a lot.  


Thursday, May 17, 2012

Lipstick

In my opinion, lipstick makes an outfit.  It can make a bold statement or simply take a backseat to showcase a dramatic eye.  Either way you prefer it, lipstick is a chance to step out and try something new!  If you are not used to wearing lipstick, it may feel like playing dress up and you may feel slightly self-conscious at first.  Especially if you are trying out a bright lipstick for the first time.  The key is to find the right shade for your coloring and a good dose of confidence.

I wear bright lipstick with a white tee shirt.  and jeans.  and heels.  It creates a look that it current, fresh, and stands out without trying so hard.  The key is to keep your other makeup simple and fresh and clean.  Think of it in terms of opposites.  If you do a bright lip, keep your eye makeup and blush simple.  If you want to vamp up the eyeliner, choose a simple soft pink or tan/nude lipstick.

With all the choices out there, where does a girl begin in finding her right shade?  You can thank Sephora.  This cosmetics chain enables you to try as many as you want before purchasing.  If you are someone who doesn't enjoy the hunt of shopping, I have put together a list of my personal favorites.  I often get asked what lipstick I am wearing, (you will too) so I've put together a photo gallery of my favorites.


#1-  HEAT WAVE by Nars.  I love the deep pigment, texture and just about everything about this lipstick.  I think orangy-reds are much easier to wear than true reds.  They feel more modern and less stuffy.


#2- SCHAP by Nars.  This is a great blue-pink lipstick.  I love wearing this with a classic navy and white stripe tee.  This looks very similar to what my bridesmaids wore (it looked AMAZING with their burnt-orange gowns--see below for pic)


#3- BE MINE by Victoria's Secret.  Yes, you can buy lipstick at VS, and yes, I think it's a great quality.  This is a pretty, everyday warm pink lipstick.


#4- FASHION'S NIGHT POUT by Revlon.  I think it's very hard to find the perfect tan/nude.  It can't be too close to your lip color or you end up looking like a ghost, but too far from your lip color and you defeat the whole purpose of a "nude".  This is perfect for a smoky eye.


#5-CANDY PINK by Revlon.  This is a great blue-pink lipstick.  See how it looks cooler than #3?  That is why it's called a blue-pink.


Ok.  So now that you've all been inspired to go out and buy some new lipstick, you might be asking how do I apply it so that I don't end up looking like a clown.  Easy.  I think the key is to build layers of color and make sure that it is saturated enough to not flake off on your teeth.

Step 1.  Apply color straight from the tube.  I've never been one to use fancy lip brushes.  I think this enables you to get the best color saturation.


Step 2.  Use your (clean) finger to ensure you've covered your entire lip.  Make sure you get to the outer edges, without going over.  Don't be so concerned with getting a perfect line... this helps prevent you from looking like you're wearing your grandmothers lipliner.


Step 3.  Blot with a tissue.  This prevents it from looking too heavy.  Now you're ready to repeat another layer of lipstick.  This will ensure that it will last a long time.  Obviously, with a deeper shade you will need to reapply more often than with a light color.


I promise, once you take the plunge and try a bright lipstick (even for practice for only an hour) you will feel that your whole face has been brightened.  It's a great way to jump into spring.  So treat yourself, and happy lipstick shopping!


Wednesday, May 9, 2012

dinner party

A few weeks ago we hosted a dinner party for a group of friends.  The idea is a "supper club", where once a month someone from the group has everyone over for dinner.  With busy jobs and some of our friends with kids, this is a perfect opportunity to catch up with each other and relax over a good meal.  

I thought it would be interesting to share some photos of the table setting and the main course.  I love setting up a table.  It's a blank canvas in which you can create any mood or feeling.  It's like setting a stage.  I have always preferred to start with what kind of mood I want to create, as opposed to a theme.  Is it a casual meal?  What time of day will you be eating?  Is it for a group of women or will there be couples? This all plays into the choices of plates, flowers or candles (or no candles).  

For this particular evening, I wanted the table to feel earthy and green and slightly masculine.  I wanted the juxtaposition of our fine wedding china (I fully believe in using what you have, not hide it away) with our colorful, cobalt blue octopus plates. Yes, they have a giant octopus on the plate and I got them from Anthropologie.  I added a lot of clear glass votives and gold striped shot glasses (which I turned into candle votives for this occasion).  Small, green orange juice glasses I picked up in Morocco for about $.50 became small vases for groups of gardenia that I snipped from outside.  I scattered these glasses across the table to add some uniformity.   A tall, spindly yellow plant sits in the center.  I planted it in a heavy stone planter to contrast all the glass.


Ideally, I find that when serving a large group of people the best main course is something that you can put in the oven for however long and then just take out when you're ready to serve.  Keep the dishes that take a lot of prep work after cooking for when you have a few people over, or family and they don't mind chipping in.  It also doesn't hurt to find a delicious recipe that looks beautiful! I found this recipe from Tyler Florence: Family Meal .  It's a beef braciola with a layer of toasted bread crumbs, garlic and parsley with fresh mozzarella, roasted red pepper and anchovies all rolled up and tied with twine.  You roast it alongside tomatoes, garlic, onions and lots of fresh thyme.  This becomes the gravy when the beef is done roasting. 


The one regret of the evening was that I didn't take any pictures of us enjoying the dinner!  After all, what's the point of having a lovely table and delicious food if you don't relish the people you're with!